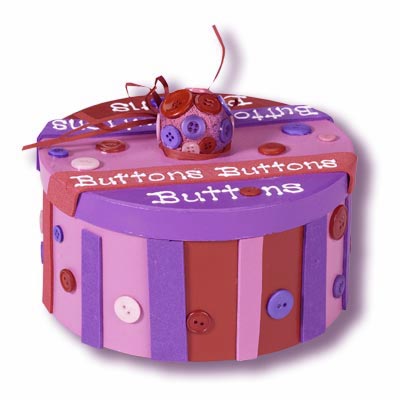
Button Box
Materials Needed:
Acrylic paint:
red, pink, purple
Brush, 3/4"
Buttons, assorted sizes and colors of box
Craft foam: red, pink, purple
Masking tape
Papier-mâché box, 7-3/4” round
Styrofoam ball, 1-3/4”
Optional: red raffia
Instructions:
For best results, please read all instructions before beginning project. Refer to photo for color and design placement.
| 1. | Use masking tape to mark off three equal sections on box lid. |
| 2. | Paint center section with pink and each of the other two sections with purple and red. Let dry. |
| 3. | Use masking tape to mark off six sections around box. Paint each section, alternating pink, purple and red. Let dry. |
| 4. | Cut craft foam into 1/2" x 3” and 3/4" x 3” strips. Glue strips around box, alternating widths and colors, using the wider strip between two different colors. Leave about 1” around the top of the box to allow for the lid to be closed. |
| 5. | Cut 1” wide strips of red and purple craft foam and glue down on either side of center pink area. Where foam overlaps onto edge of lid, score, bend to fit sides and glue down. Secure with masking tape. |
| 6. | Flatten bottom of Styrofoam ball. Press desired buttons into ball to mark their positions (this will also help them hold better when glued). Brush pink, purple and red paint onto ball; let dry. Glue on buttons. |
| 7. | Use dimensional paint to write “Buttons” on foam strips on lid. On remaining areas on lid, also write “Buttons,” leaving a space between the “t” and the “n” where a small button will be glued. Glue remaining buttons in center part of lid and also around sides of box between the foam strips. Secure with tape. Let dry. Glue the button knob on top. If desired, tie raffia around knob. |