save time with
pocket holes
You won't find a faster way to build basic cabinets, and they're handy for assembling tricky joints, too.
With all
of the great woodworking joints at our disposal, most of which don't
require hardware of any kind, a woodworker has to wonder: Why use a
pocket-hole joint? The answer is simple: Pocket holes offer the quickest
way imaginable to build a face frame, assemble a cabinet, or join parts
that would be difficult to clamp. And they provide plenty of holding
power, too. Of course, you could try to drill the pocket holes freehand,
but a commercial jig helps you do it far more accurately and
efficiently. Let us show you the basics, using a Kreg K2000 jig as our
main example. (Kreg's Mini jig is represented in the drawing below.) To
learn more about pocket-hole jigs, see page 62.
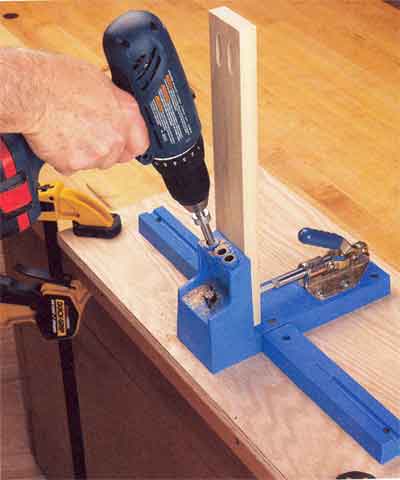
When using a jig like this one, take a minute to mount it on a plywood
panel. Then, you can easily clamp the unit to your workbench.
A pocket-hole joint at a glance
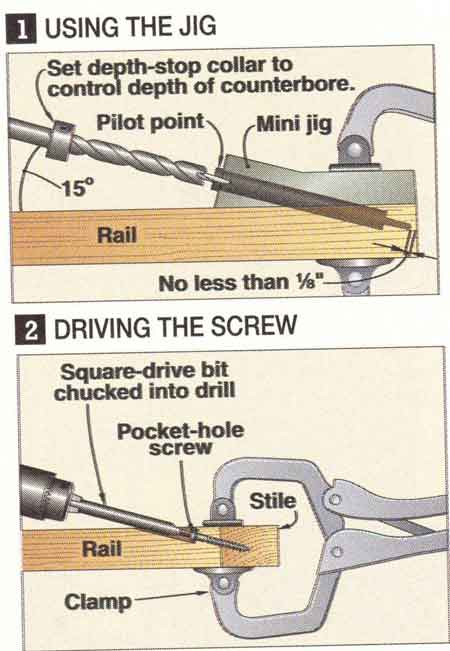
A pocket hole enters wood at an angle of about 15° to the workpiece
surface, allowing you to drill toward the end or edge of a project part
as shown in the photo above. A specially designed drill bit equipped
with a stop collar (Drawing 1) creates a hole large enough to accept the
head of a screw, while also drilling a small hole for the shank.
Use screws with coarse threads to join softwood, plywood, or
medium-density fiberboard (MDF), and fine threads for hardwoods (see
photo below). Pocket-hole screws have a self-tapping auger point. This
point, combined with the untapered profile of the screw, allows you to
drive the screw into the adjoining part without a pilot hole. Even dense
woods, such as oak, should not split.
The screws also feature a round washer head (so named because it has
extra bearing surface built into the bottom of the head). This design,
which prevents the head from being pulled into the wood, guarantees a
tight connection.
Drill at least two holes to resist
twisting. Add glue to the mating surfaces if you don't intend to
disassemble the parts later. Use clamps to ensure flush surfaces, as
shown in Drawing 2. Now, insert the screws, and drive them to full
depth, drawing the two parts together.
Let's put it to use
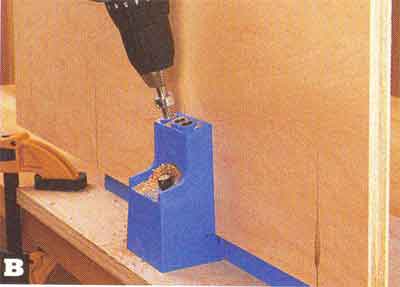
Face frames come together quickly with pocket-hole joinery, as shown in
Photo A. As you can see, we built a support platform out of 2x4s to make
the process go even more smoothly. The platform holds your workpiece up
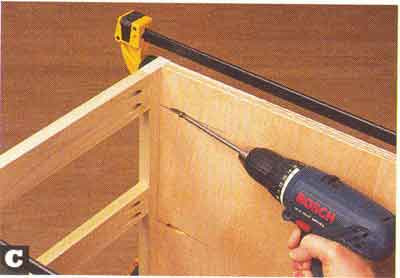
off the bench, creating space for clamps. Pocket holes save a lot of
time when you build basic cabinets, as shown in Photos  and C.
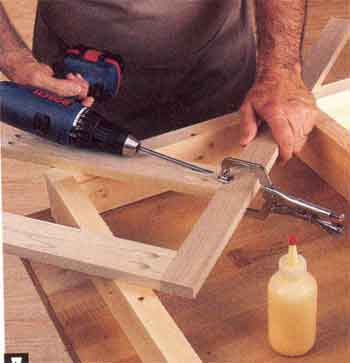
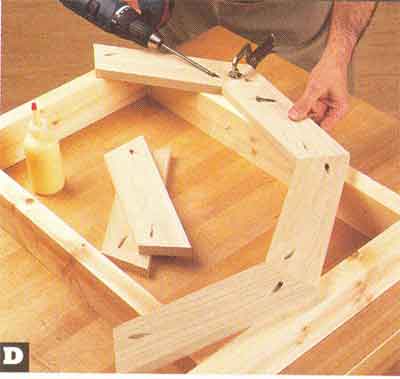
Pocket-hole joinery also stands out as a way to assemble angled,
hard-to-clamp joints, like the ones found in a multiple-sided frame. See
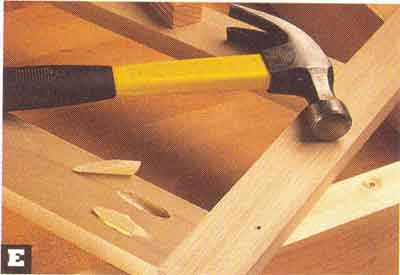
Photo D for an example. Pocket-hole joinery creates long, unsightly
surface holes at each joint. That's not a problem for concealed
surfaces. For sometimes-seen surfaces, you might decide to fill the
holes with commercially available plugs, as shown in Photo E (or make
your own plugs from dowels). The result might not be acceptable on
highly visible project surfaces, though. In such cases, another joint
type, say biscuits, might give better results